


The Dirt on Soil Blocking (3 min read)
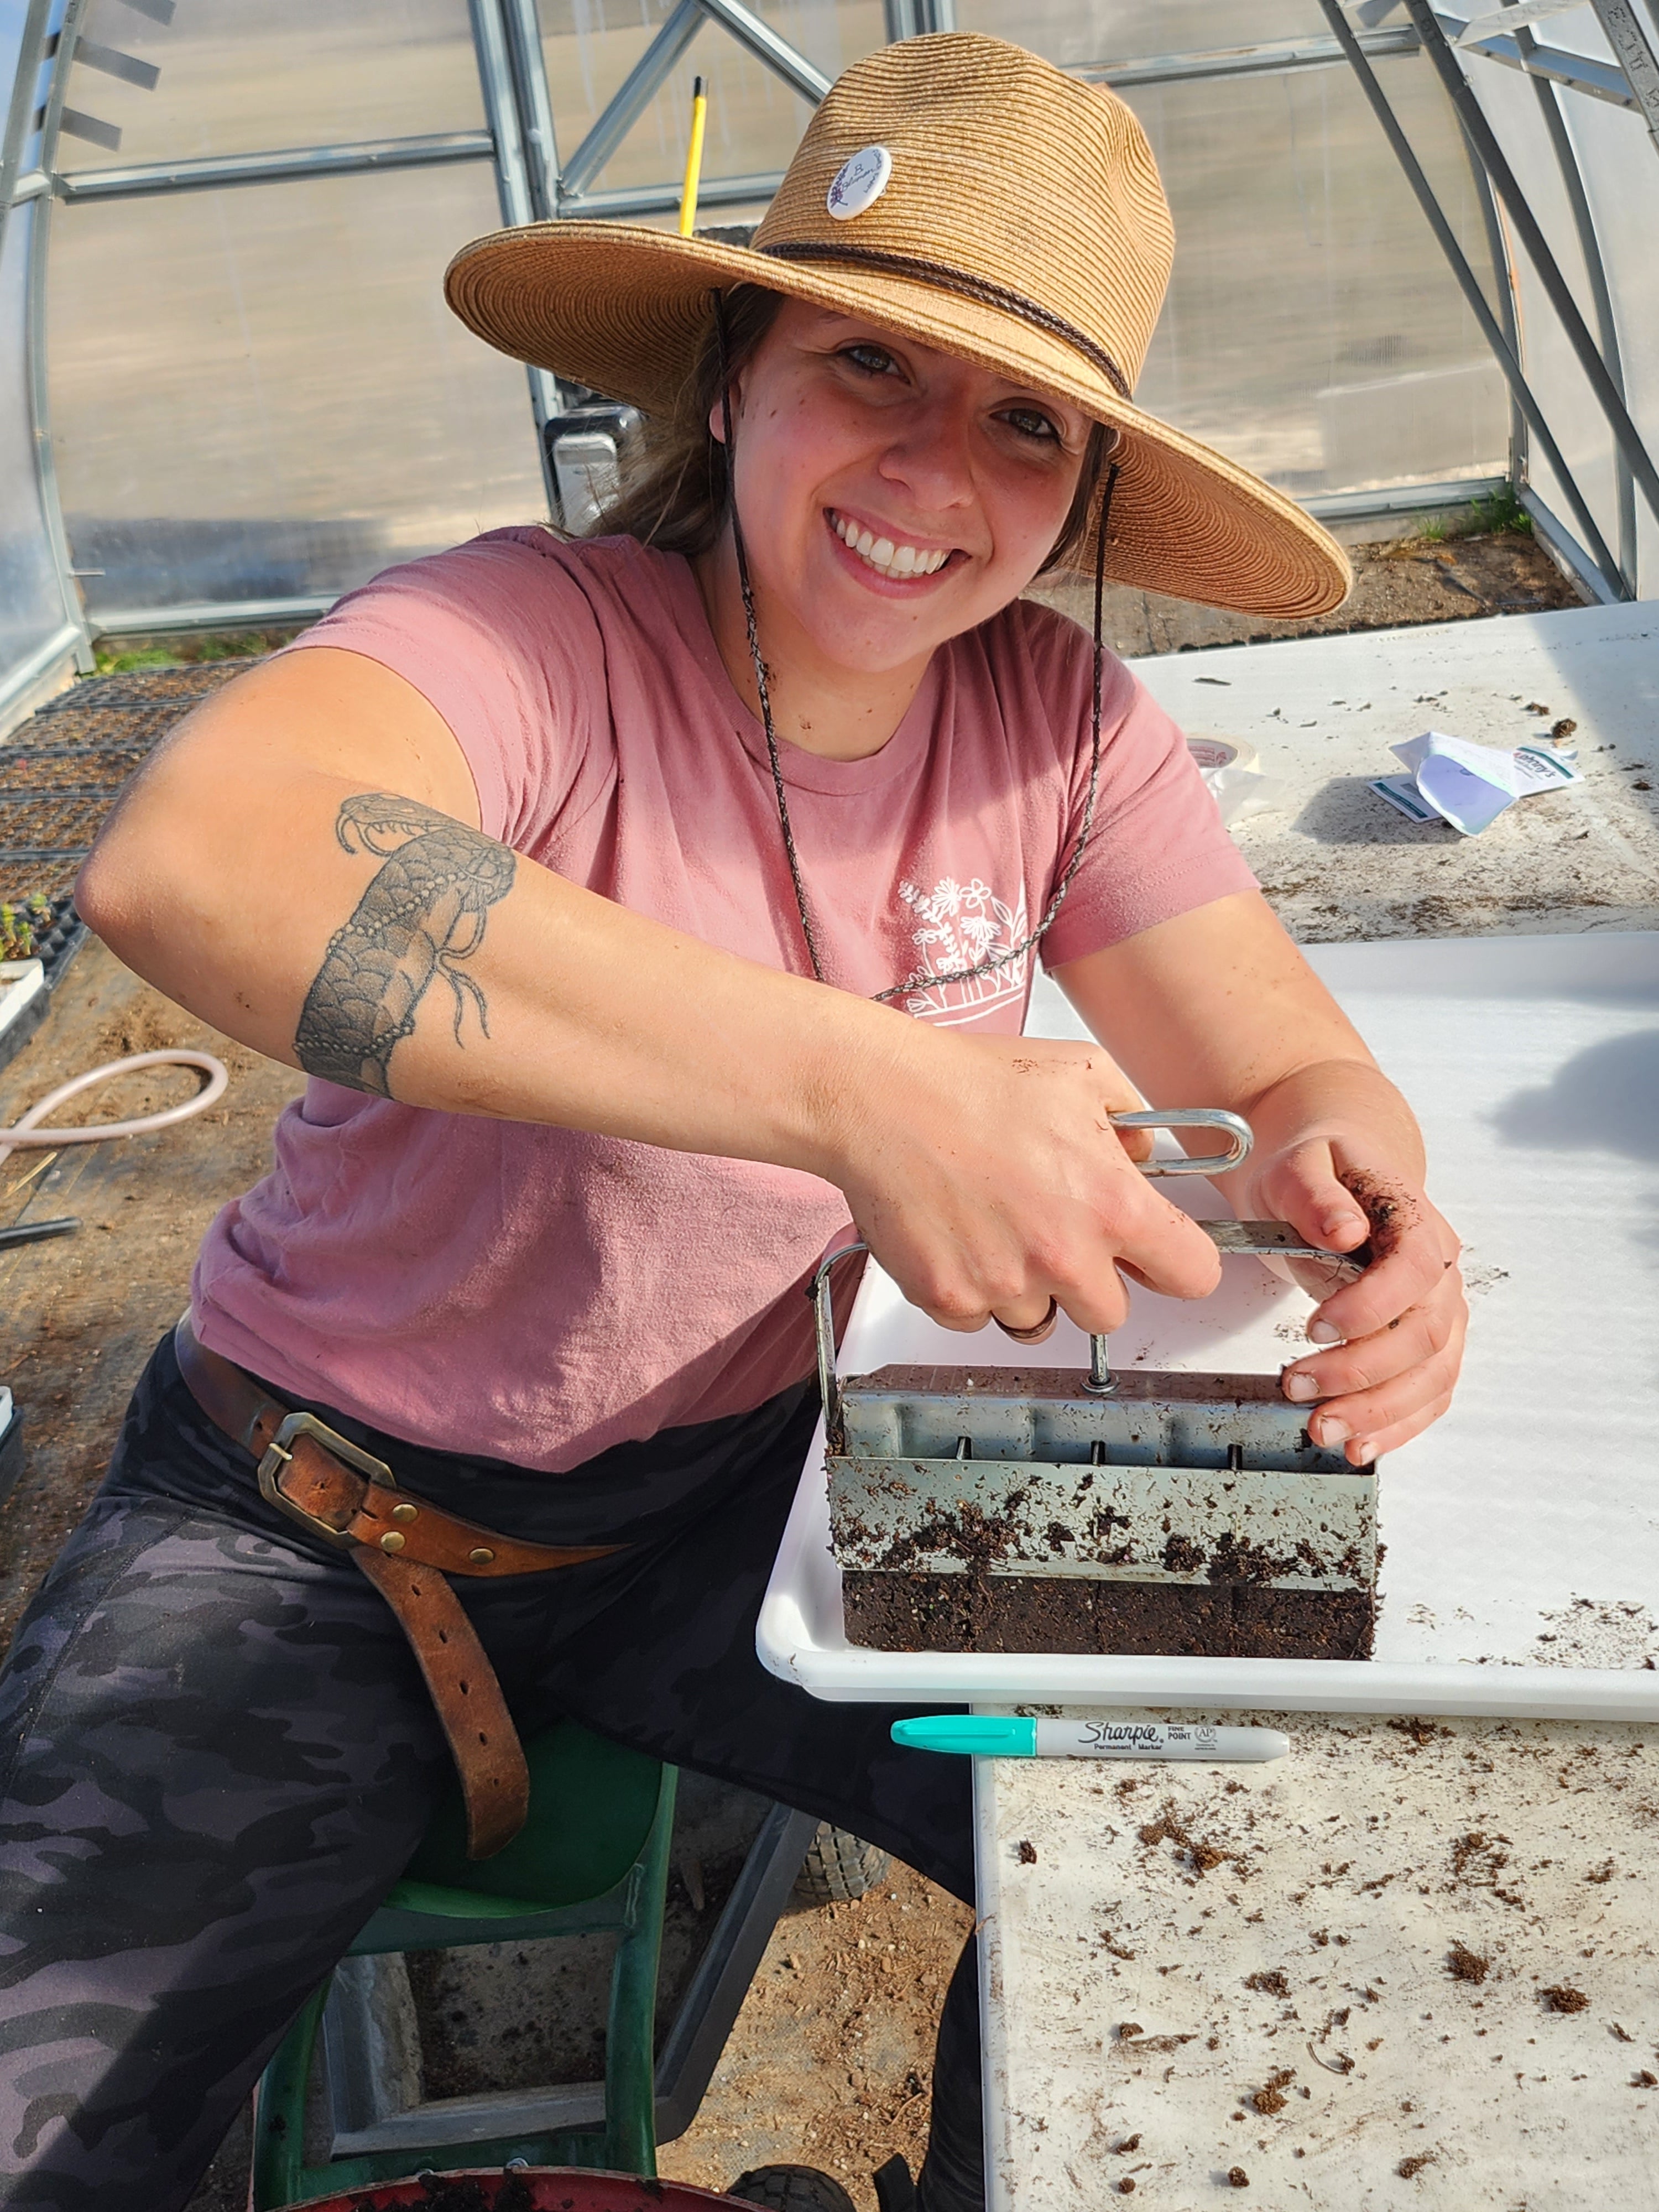
We made a big change in our growing methods this year by starting all of our seedlings in soil blocks rather than seed trays (shown below). There were multiple factors that played into this decision that we'll touch on in this blog as well as our soil blocking recipe and the purpose of all of the ingredients within that recipe.

The first reason we switched from seed trays to soil blocks is rather simple, they make for happier, healthier seedlings. A soil block is a free standing block of soil with a seed planted in the middle of it. As that seed sprouts and grows, it's roots hit the sidewalls of the block and do what we call "air pruning" this means that the tip of the root is pruned which therefore causes lateral roots to form off of that shoot and ultimately make for a healthier root system. When seedlings are grown in seed trays they often get rootbound or form matted roots which can (and often does) effect the plants long term health and ability to put out a healthy root system once in the ground.
Another perk of soil blocks is that there is little to no transplant shock when a seedling goes into the ground. This means that your seedlings will take off faster once planted as well as that you can now start specific seedlings ahead of time that you would normally only be able to directly sow into the garden (i.e. sunflowers, peas, etc.).
The second reason we started using soil blocks is that I got tired of having to buy new seed trays every year, it felt extremely wasteful and I found myself using seed trays that had been split in half to make them stretch longer and that just leads to seedlings on the ground and a lot of frustration. The only plastic used with soil blocks is the heavy duty restaurant serving trays (shown below) that we place the soil blocks onto. These however will last for a very long time and stack away nicely when not in use.

I'm first going to give you our soil blocking recipe and then break down each ingredient so that you know what it's purpose in the mix is.
Recipe:
3 quarts Peat Moss
2 quarts Perlite
1 quart Garden soil
1 quart Compost
1 cup Bloodmeal
1 cup Greensand
1 cup Bonemeal
2 tbsp Cinnamon
The Peat Moss adds body and structure to the soil blocks, playing the most important role in keeping it all together.
Compost adds organic matter to the mix.
Garden Soil (from your personal garden or planting area) allows seedlings to be partially accustomed to the type of soil that you have and therefore reduce transplant shock at the time of planting. This step should be skipped if there's a chance your garden soil has herbicides or disease within it.
Perlite is extremely important and adds aeration to the mix, allowing seedlings to more freely put out roots.
Greensand, Bloodmeal and Bonemeal are all organic sources of Potassium, Nitrogen and Phosphorus in that order. So by adding a small amount to your soil mix your giving your seedlings their necessary nutrition for the time that their in their soil blocks.
Lastly, the Cinnamon is a brilliant addition that helps to prevent the growth of algae on your soil blocks which if you've grown seedlings before you know that algae can be a big nuisance.

Soil Blocking Tips:
Bottom water or mist soil blocks to avoid breaking them apart with a strong spray of water.
The 3/4" soil blocks (small size) are excellent for starting seeds that have a poor germination rate and then when they sprout you can pop that tiny soil block into the larger 2" block to grow out.
My favorite soil block however is the 1.5" size, it's extremely versatile and works for 90% of seed varieties.
Links:
Soil Blocks : https://www.johnnyseeds.com/search/?q=soil+blocks&search-button=&lang=en_US
Lunch Trays: https://www.webstaurantstore.com/search/plastic-food-trays.html
Thank you so much for reading and I happy gardening!!
.%20There%20were%20multiple%20factors%20that%20played%20into%20this%20decisio...)