- Article published at:
- Article author: Robin Blood
- Article comments count: 0
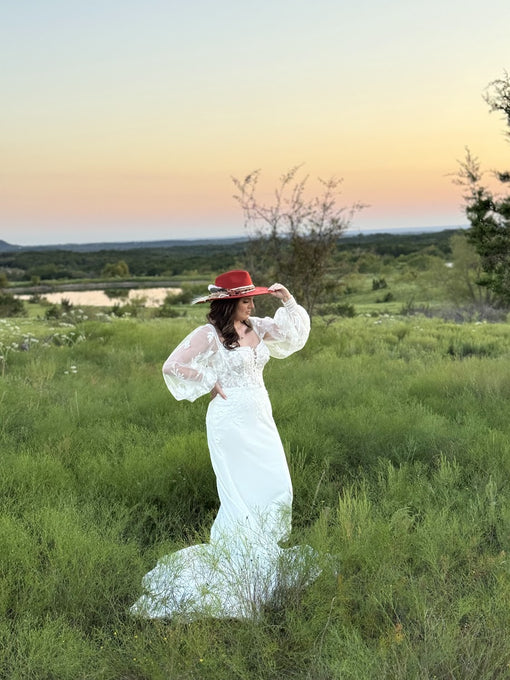
Garden style weddings are all the rage in today’s bridal world. This theme combines the inherent majesty of the natural world with the timelessness and class of the weddings industry.
In this piece, we’re going to talk everything garden style weddings from the perspective of a professional wedding florist. We're going to walk you through some principles for determining your ideal colors and textures, we’re going to discuss some specific garden style themes that we love right now, and lastly we will share some of the unique trends that we believe will take your garden style wedding to the next level.
After reading this, you’re going to love garden style weddings so much, your fiancé might even get jealous. Florals aren’t just a part of the wedding, they are the wedding. Being in the wedding floral industry, we’re thrilled to see a wedding style that’s all about the stories that flowers can tell about people in love. By the time you're done reading, you'll be convinced this is the perfect wedding style for you and will have you wishing for that seasonal spring aesthetic all year around.
Color
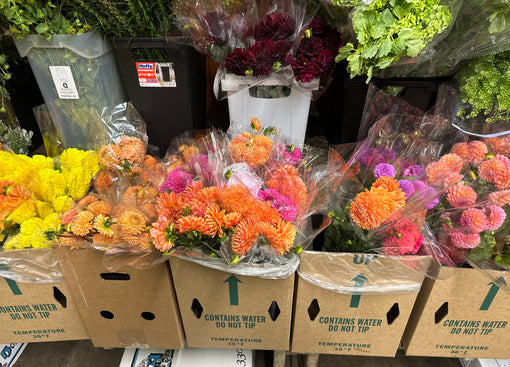
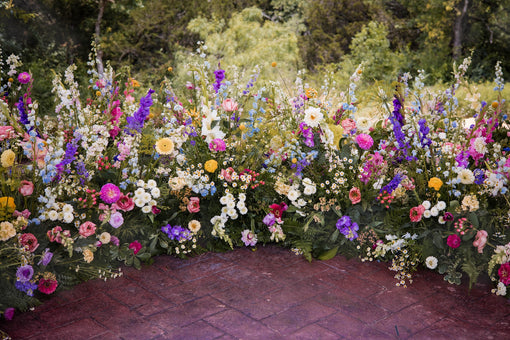
With the garden style theme, color is your best friend. There are so many combinations and gradients that your florist can utilize to tell your specific love story. As a florist, I always tell my prospective brides to use “any colors and as many colors as you want!”
When choosing what colors to incorporate into your wedding, I suggest starting by considering families of colors. When talking to your florist, this can help them begin to get a feel for the vibe you're looking for and narrow in on your overall vision. Below are some categories of color to consider for your garden style wedding.
● Warm Colors: Oranges, yellows, reds and pinks
This family of colors is a great look for fall garden style weddings. The reds and oranges will compliment outdoor venues that are chosen for the purpose of experiencing seasonal color change.
● Cool Colors: Purples, pinks, and blues
Cooler colors look absolutely fabulous when they are used in pastel shades! This is a great look for those early spring wedding dates and really is a versatile and sharp look as a garden style color palette
● Complimentary Colors:
Complimentary colors are colors that are directly opposite each other on the color wheel. For example, blue and orange, or yellow and purple. These color combos serve to make eachother “pop” off the page. This type of color strategy makes for an extremely vibrant and impactful theme with garden style weddings.
● All Colors
This is certainly the most true-to-form way to embrace garden style weddings. Any and every color combination goes here. This is easily the best way to represent all the various shades and tints of the natural world. A good tip here is to talk to your florist about excluding one or two certain colors if you really dont like them. There will be so many colors to look at, that one or two won't even be missed.
● White
White and green is a perfect garden style theme that works regardless of the season. This theme is all about the types of flowers used and how they are arranged with each other. Our favorite way to achieve a great look is by combining all white roses, larkspur, zinnias, and tulips. A great tip for pulling this theme together is to think of everything your grandmother would have grown in her personal garden, and you'll be on the right track.
Texture
Texture is vital in any garden style wedding. As we will discuss below, there are a variety of different types of garden wedding, each with their own specific textural elements, but there are certainly a few staples that we suggest you look at regardless of your overall vision or style.
● Linen
Incorporating linen elements into your decor items is a great way to bring that cozy garden afternoon tea vibe into your theme. This can be accomplished through texturally printed table cloths and napkins, or you can source elaborate table runners that will flow down the middle of your long dinner tables. Take this design element to the next level by also incorporating lace elements to your linen and you will be thrilled with how much of an impact this makes to your base garden style design.
● Wicker
Wicker brings a fabulous woody texture without making your decor feel cliche or overtly “rustic”. We're not going for a “barn” or “farmhouse” look with a garden style wedding, so using wicker baskets and chairs in place of heavy literal wood elements is a much sharper look for what youre looking for with this theme.
● Venue selection
This may seem a little out of place for this particular topic, but venue choice can play a vital part in how your overall vision comes together. The best advice here is to be very selective when choosing the setting for your garden style wedding. You want to make sure the physical location has natural features that compliment this theme. This means looking at places that have a variety of green spaces where you can hold an outdoor ceremony or reception. You want to look for venues with a lot of trees, vines, stoney walking paths, or open grass spaces. Choosing an appropriate venue for this style of wedding can save you a lot of time and energy trying to transform a less equipped venue, and gives your florist a good base in which to design on.
● Candles
Incorporating candles into your garden wedding is a very underrated “textural” element. While it might not be a traditional texture per say, what it does add is a natural light element to your decor and enhance your color features. Your floral may look great in the peak light of day, but most people don't think about how to keep that impact through a reception lasting into the evening hours. Think about looking at a christmas tree through a living room window at night; the lighting really enhances the look of all of the gorgeous ornaments. That is what candles can do for all of your beautiful garden style floral.
Our Favorite Garden Wedding Styles
Italian
An Italian style garden wedding is all about the textures and organic shapes of arrangements. With this theme, you'll want to create an overgrown, bright, warm feel. Try to think of an Italian villa with natural gardens and large stone pots with flowy, uncontained greenery and floral.
Look for venues that have large brick or stone patios where you could line up wooden tables with flowing table runners and tall candles. You'll want your centerpieces to have a vast mix of colors as well as branching greenery. Try to give everything that loose, airy feel. Incorporate citrus elements like lemons and oranges into your decor to give a literal representation of the garden theme.
This is a theme we've been seeing a lot in the wedding floral industry recently and we absolutely love creating a vision for these with our brides.
Enchanted
Here is a theme where lighting and setting are vital. These enchanted style garden weddings are absolutely perfect for outdoor, evening weddings and receptions.
For this look, you'll want to find a venue that has some large trees with massive trunks and giant, winding limbs. These can be a focal piece that you get married in front of, or set a backdrop for a beautiful evening dinner reception.
You can do some gravity defying stunts with your floral including hanging chandeliers from the trees and designing large vases filled with water and floral to give you a floating floral effect at the table.
Since this is a perfect wedding theme for evenings, you'll want to really bring those candles into the equation. This will enhance the mood of the enchanted theme, and will reflect natural light off all of those incredible vases.
Vintage
The vintage style is all about taking those classic, traditional wedding elements and combining them with the natural, organic vibe of a garden. Think about all the things you would find in your grandma’s house. Crochet, lace, china, and even ceramic vases are all fantastic décor options for a vintage garden style wedding. This wedding style is designed to take your guests back in time, so try visiting your local thrift store to find some vintage pieces that could be repurposed.
In terms of floral design, you'll want to use a more traditional wedding color palette. This includes all of your whites, pinks, and greens. Unlike other garden styles we have discussed that thrive with extensive color combinations and a free color palette, the vintage style is better represented by a tighter color palette based around those softer colors.
Garden Wedding Trends
Floral Confetti
Floral confetti is a fun and trending way to utilize your wedding flowers in a unique way. Talk to your florist about ordering enough extra flowers so that they can match your garden style theme with a few baskets of petals to be used in your ceremony or reception. Whether your guests shower you with petals as you make your way back down the aisle after you say “I do”, or if you wait until your grand exit to make your way out in style as a married couple, this trend will never disappoint and is sure to leave your guests with a smile on their face as well making a stunning moment for your wedding photographer to capture.
Flower Box Welcome Sign
If you want to add a “Wow!” moment for your guests that sets the tone for your garden theme at the front door, ask your florist to create a “window box” effect at the base of your welcome sign utilizing a mix of the stems and filler being used throughout your wedding floral. This element will bring dimension, color, and life to a piece of decor that is easy to walk by without a second thought, and also serves to draw interest and curiosity for your guest as to what they are in store for with your beautiful garden style wedding.
Private garden arbor
Your wedding will only last a day, but the photos will last a lifetime! Consider exchanging your private vows or having your first look under a private garden arbor to elevate your garden style wedding experience.
Every garden style wedding will have traditional elements like a gorgeous floral arch, lush aisle markers, and beautiful floral hanging backdrops, but one trend that we love that is rarely done is having that special place that only the bride and groom share right before they tie the knot officially.
Weddings are about sharing your special day with loved ones, but there is something special about having that first look, or exchanging your private vows under your very own private arbor that is absolutely teeming with your wedding flowers. When you look back on your wedding day, the photos of this moment will share a fairytale story of two lovers escaping into a secret garden to share one last special moment before entering marital bliss.
If you’re ready to get started planning your dream garden wedding, check out our bridal questionnaire by clicking here!
Learn More