As a flower farm in Texas we've tried many different seed starting methods. Through trial and error we've found that soil blocking is a vastly superior technique compared with the traditional plastic seed starting trays.
One of the main benefits of soil blocking is that it allows for more efficient use of space. Traditional seed starting methods, such as using trays with individual cells, can take up a lot of room in a greenhouse. With soil blocking, the seedlings are grown in small blocks of soil, which are then stacked on top of each other. This allows for many more seedlings to be grown in a smaller area. Another benefit of soil blocking is that it helps to reduce the need for transplanting. When seedlings are grown in individual cells, they must be transplanted into larger containers as they grow due to the root system of the plant becoming root-bound within the small growing area. This can cause stress on the seedlings and can lead to transplant shock. Additionally, the roots within the small cells will grow in a circular pattern, inevitably choking out the plant's ability to absorb nutrients. With soil blocking, the seedlings are grown in blocks of soil that allow the roots to spread more naturally and in turn can be more successfully transferred to larger containers or directly into the garden. This eliminates the need for transplanting and helps to reduce stress on the seedlings. Soil blocking also helps to reduce the risk of disease. When seedlings are grown in a tray with many cells, it is easy for disease to spread from one seedling to another. With soil blocking, each seedling is in its own block of soil, which helps to reduce the risk of disease. In addition, soil blocking allows for better control of moisture and temperature. When seedlings are grown in a tray with many cells, it can be difficult to keep the soil at the right moisture level. With soil blocking, the small blocks of soil can be easily misted or watered, which allows for better control of moisture. Soil blocking also allows for better control of temperature, as the small blocks of soil can be easily moved to different parts of the greenhouse to ensure the seedlings are getting the right amount of light and heat. Overall, soil blocking is a technique that offers many benefits for starting seeds. It allows for more efficient use of space, reduces the need for transplanting, reduces the risk of disease, and allows for better control of moisture and temperature. If you're looking to start seeds this season, consider giving soil blocking a try.
Garden style weddings are all the rage in today’s bridal world. This theme combines the inherent majesty of the natural world with the timelessness and class of the weddings industry.
In this piece, we’re going to talk everything garden style weddings from the perspective of a professional wedding florist. We're going to walk you through some principles for determining your ideal colors and textures, we’re going to discuss some specific garden style themes that we love right now, and lastly we will share some of the unique trends that we believe will take your garden style wedding to the next level.
After reading this, you’re going to love garden style weddings so much, your fiancé might even get jealous. Florals aren’t just a part of the wedding, they are the wedding. Being in the wedding floral industry, we’re thrilled to see a wedding style that’s all about the stories that flowers can tell about people in love. By the time you're done reading, you'll be convinced this is the perfect wedding style for you and will have you wishing for that seasonal spring aesthetic all year around.
Color
With the garden style theme, color is your best friend. There are so many combinations and gradients that your florist can utilize to tell your specific love story. As a florist, I always tell my prospective brides to use “any colors and as many colors as you want!”
When choosing what colors to incorporate into your wedding, I suggest starting by considering families of colors. When talking to your florist, this can help them begin to get a feel for the vibe you're looking for and narrow in on your overall vision. Below are some categories of color to consider for your garden style wedding.
● Warm Colors: Oranges, yellows, reds and pinks
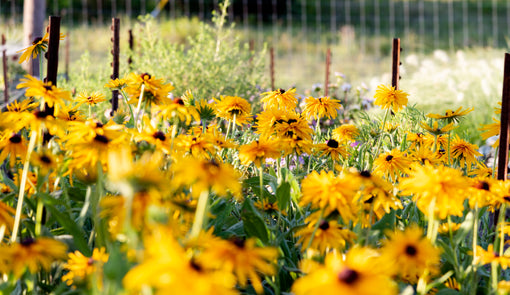
This family of colors is a great look for fall garden style weddings. The reds and oranges will compliment outdoor venues that are chosen for the purpose of experiencing seasonal color change.
● Cool Colors: Purples, pinks, and blues
Cooler colors look absolutely fabulous when they are used in pastel shades! This is a great look for those early spring wedding dates and really is a versatile and sharp look as a garden style color palette
● Complimentary Colors:
Complimentary colors are colors that are directly opposite each other on the color wheel. For example, blue and orange, or yellow and purple. These color combos serve to make eachother “pop” off the page. This type of color strategy makes for an extremely vibrant and impactful theme with garden style weddings.
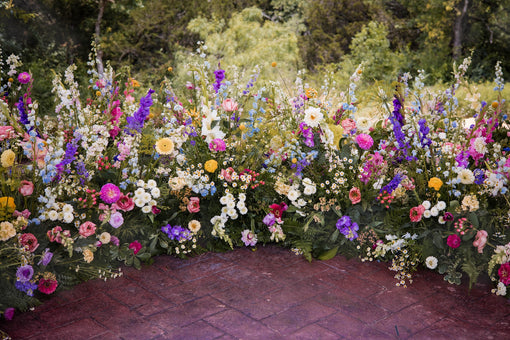
● All Colors
This is certainly the most true-to-form way to embrace garden style weddings. Any and every color combination goes here. This is easily the best way to represent all the various shades and tints of the natural world. A good tip here is to talk to your florist about excluding one or two certain colors if you really dont like them. There will be so many colors to look at, that one or two won't even be missed.
● White
White and green is a perfect garden style theme that works regardless of the season. This theme is all about the types of flowers used and how they are arranged with each other. Our favorite way to achieve a great look is by combining all white roses, larkspur, zinnias, and tulips. A great tip for pulling this theme together is to think of everything your grandmother would have grown in her personal garden, and you'll be on the right track.
Texture
Texture is vital in any garden style wedding. As we will discuss below, there are a variety of different types of garden wedding, each with their own specific textural elements, but there are certainly a few staples that we suggest you look at regardless of your overall vision or style.
● Linen
Incorporating linen elements into your decor items is a great way to bring that cozy garden afternoon tea vibe into your theme. This can be accomplished through texturally printed table cloths and napkins, or you can source elaborate table runners that will flow down the middle of your long dinner tables. Take this design element to the next level by also incorporating lace elements to your linen and you will be thrilled with how much of an impact this makes to your base garden style design.
● Wicker
Wicker brings a fabulous woody texture without making your decor feel cliche or overtly “rustic”. We're not going for a “barn” or “farmhouse” look with a garden style wedding, so using wicker baskets and chairs in place of heavy literal wood elements is a much sharper look for what youre looking for with this theme.
● Venue selection
This may seem a little out of place for this particular topic, but venue choice can play a vital part in how your overall vision comes together. The best advice here is to be very selective when choosing the setting for your garden style wedding. You want to make sure the physical location has natural features that compliment this theme. This means looking at places that have a variety of green spaces where you can hold an outdoor ceremony or reception. You want to look for venues with a lot of trees, vines, stoney walking paths, or open grass spaces. Choosing an appropriate venue for this style of wedding can save you a lot of time and energy trying to transform a less equipped venue, and gives your florist a good base in which to design on.
● Candles
Incorporating candles into your garden wedding is a very underrated “textural” element. While it might not be a traditional texture per say, what it does add is a natural light element to your decor and enhance your color features. Your floral may look great in the peak light of day, but most people don't think about how to keep that impact through a reception lasting into the evening hours. Think about looking at a christmas tree through a living room window at night; the lighting really enhances the look of all of the gorgeous ornaments. That is what candles can do for all of your beautiful garden style floral.
Our Favorite Garden Wedding Styles
Italian
An Italian style garden wedding is all about the textures and organic shapes of arrangements. With this theme, you'll want to create an overgrown, bright, warm feel. Try to think of an Italian villa with natural gardens and large stone pots with flowy, uncontained greenery and floral.
Look for venues that have large brick or stone patios where you could line up wooden tables with flowing table runners and tall candles. You'll want your centerpieces to have a vast mix of colors as well as branching greenery. Try to give everything that loose, airy feel. Incorporate citrus elements like lemons and oranges into your decor to give a literal representation of the garden theme.
This is a theme we've been seeing a lot in the wedding floral industry recently and we absolutely love creating a vision for these with our brides.
Enchanted
Here is a theme where lighting and setting are vital. These enchanted style garden weddings are absolutely perfect for outdoor, evening weddings and receptions.
For this look, you'll want to find a venue that has some large trees with massive trunks and giant, winding limbs. These can be a focal piece that you get married in front of, or set a backdrop for a beautiful evening dinner reception.
You can do some gravity defying stunts with your floral including hanging chandeliers from the trees and designing large vases filled with water and floral to give you a floating floral effect at the table.
Since this is a perfect wedding theme for evenings, you'll want to really bring those candles into the equation. This will enhance the mood of the enchanted theme, and will reflect natural light off all of those incredible vases.
Vintage
The vintage style is all about taking those classic, traditional wedding elements and combining them with the natural, organic vibe of a garden. Think about all the things you would find in your grandma’s house. Crochet, lace, china, and even ceramic vases are all fantastic décor options for a vintage garden style wedding. This wedding style is designed to take your guests back in time, so try visiting your local thrift store to find some vintage pieces that could be repurposed.
In terms of floral design, you'll want to use a more traditional wedding color palette. This includes all of your whites, pinks, and greens. Unlike other garden styles we have discussed that thrive with extensive color combinations and a free color palette, the vintage style is better represented by a tighter color palette based around those softer colors.
Garden Wedding Trends
Floral Confetti
Floral confetti is a fun and trending way to utilize your wedding flowers in a unique way. Talk to your florist about ordering enough extra flowers so that they can match your garden style theme with a few baskets of petals to be used in your ceremony or reception. Whether your guests shower you with petals as you make your way back down the aisle after you say “I do”, or if you wait until your grand exit to make your way out in style as a married couple, this trend will never disappoint and is sure to leave your guests with a smile on their face as well making a stunning moment for your wedding photographer to capture.
Flower Box Welcome Sign
If you want to add a “Wow!” moment for your guests that sets the tone for your garden theme at the front door, ask your florist to create a “window box” effect at the base of your welcome sign utilizing a mix of the stems and filler being used throughout your wedding floral. This element will bring dimension, color, and life to a piece of decor that is easy to walk by without a second thought, and also serves to draw interest and curiosity for your guest as to what they are in store for with your beautiful garden style wedding.
Private garden arbor
Your wedding will only last a day, but the photos will last a lifetime! Consider exchanging your private vows or having your first look under a private garden arbor to elevate your garden style wedding experience.
Every garden style wedding will have traditional elements like a gorgeous floral arch, lush aisle markers, and beautiful floral hanging backdrops, but one trend that we love that is rarely done is having that special place that only the bride and groom share right before they tie the knot officially.
Weddings are about sharing your special day with loved ones, but there is something special about having that first look, or exchanging your private vows under your very own private arbor that is absolutely teeming with your wedding flowers. When you look back on your wedding day, the photos of this moment will share a fairytale story of two lovers escaping into a secret garden to share one last special moment before entering marital bliss.
If you’re ready to get started planning your dream garden wedding, check out our bridal questionnaire by clicking here!
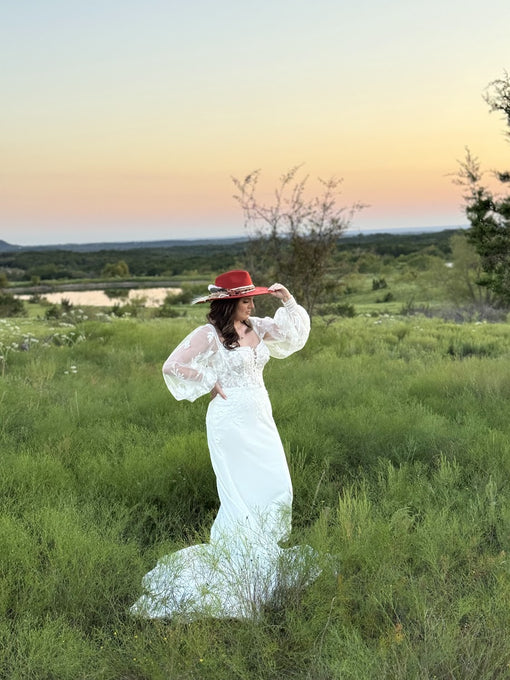
The boho wedding theme has been popular amoung brides for years and offers sustainable ways to show a couple’s personality through décor. This wedding theme is made for the couples who wants their wedding to be a purposeful gathering and not just another party.
What Is A Boho Wedding?
Boho, short for bohemian, is a word used to describe someone artsy and free-spirited, like a modern-day hippie. Boho weddings embrace the best of all things natural and vintage. It combines modern trends with trends of the 60s and 70s. If you want lots of freedom during your wedding planning process, the boho theme is perfect as it encourages mixing textures and colors.
The goal of a boho theme is to provide a calm and inviting atmosphere. This type of wedding embraces and incorporates the nature around it. It brings elements of the homey indoors outside, showing that nature is true home.
Color
Boho weddings incorporate tan and beige mixed with deep or dusty colors. However, couples who want to keep their colors simple and light only use tan, beige, and white. Color combinations for a boho wedding will depend on the season. Fall and Winter boho weddings look best using deeper colors such as terracotta, maroon, and forest green. Spring and Summer weddings look best with lighter colors such as mustard, sage, and dusty pink. These colors can be used interchangeably based upon what the couple decides looks best.
Textures
The four most essential textures that should be incorporated into a boho wedding are wood, wicker, lace, and fringe. Wood and wicker will bring a homey vibe to your space, but you also want to include those vintage, free-spirited textures such as lace and fringe. If you’re looking for a way to incorporate color into different textures, think about using velvet and/or stained glass. Velvet looks beautiful in almost any color and is the perfect texture for colder seasons. Stained glass is so unique and can tie in all of your wedding colors.
Decor
Donkeys- Take some wedding pictures with a donkey, you won’t regret it. The wedding donkeys started as a Greek tradition where the donkey escorts the bride to the ceremony. Now, wedding donkeys act as photo ops and beer burros. This will add so much character to your wedding photos and your guests will love getting to interact and take pictures with an animal.
Rugs- Remember that one of the goals of a boho wedding is to bring the cozy indoors outside. Whether it’s down the aisle or on the dance floor, rugs are great way to accomplish this and let your guests know that it’s okay to take their shoes off.
Thrifted Pieces- Thrifting décor is the perfect way to add that vintage feel to your boho wedding while mixing different colors and textures. Lots of couples' thrift glassware so their guests have their own unique table set. Also, the textures talked about earlier can easily be found in thrift stores. Give it a shot because, not only is it affordable, it’s a great way to practice sustainability.
Floral
Boho style wedding florals exchange greenery for statements of pampas grass and dried palm with flowers of different textures, shapes, and sizes. Boho floral arrangements are asymmetrical and put loosley put together giving them a natural appearance. Dried flowers pair well with boho color schemes and add that vintage feel to your wedding. Consider these aspects when designing your arrangment or consulting with your florist and your graunteed to have the perfect boho floral arrangements.
Venue
Ask yourself these questions when choosing a venue for your boho wedding:
Are my wedding colors going to blend into the space?
If forest green is the color of your bridesmaid dresses, avoid getting married in a forest so they don’t blend into the background.
Can everyone move freely between indoors to outdoors?
Outdoor spaces are ideal for a boho wedding. However, if you decide to hold the reception indoors, it is best to find a venue that allows guests to move freely inside and outside. This way the nature around your wedding can still be embraced with the practicality of being indoors.
Does this place embody the aspects of a bohemian style wedding?
If you’re getting married outdoors, consider your biome. A forest or desert will be a lot more aesthetically pleasing for a boho wedding than getting married in a field of wildflowers or snow. If you are getting married indoors, make sure the venue encapsulates what a bohemian wedding is, cozy, vintage and free-spirited.
I found the perfect outdoor wedding venue, but what about rain?
Consider renting a tent. A tent will offer protection from rain and a place to hang arrangements. It’s also the best way to nail that free-spirited aspect of a boho wedding through a venue.
If you love all things vintage, free-spirited, and want to embrace nature in your wedding, a bohemian wedding is right up your alley. Answer the questions in our bridal survey to see if a bohemian style wedding is right for you!
One thing you’ll want to take advantage of this fall are the free seeds sitting in your garden. If you want to learn how to harvest and store your seeds keep reading!
As cooler weather arrives, you will notice some of the flowers in your garden start to dry out. These are the flowers you will want to harvest seeds from, but make sure they are COMPLETELY dry. Make sure you harvest your seeds on a dry day. If it’s raining outside and the seed head is wet, there is a higher chance of it getting moldy.
Let’s look at some of the seed heads in the garden and see if they’re ready to be harvested.
Trait 1
As you can see in the picture above, the seed head to the left is still bright and fluffy. Therefore, it is still developing. The seed head to the right, however, looks brown and hard to the touch meaning it’s dry and ready to harvest. (Gomphrena is shown above)
Trait 2
The seed head to the right is still too green to harvest seeds from. However, the seed head to the left broke apart very easily indicating it is mature. (Scabiosa is shown above)
Trait 3
A pro tip to help decipher whether a flower’s seeds are ready to be harvested or not, especially zinnias, is by looking at the stem. If the stem has began to turn hard and brown, like the stem on the right of this photo, then your seeds are ready to harvest.
Pro Tip
Some flowers need a little extra work to harvest seeds, like celosia. The first thing you want to do is remove the seed heads from the bottom of the stem. Rub them together between your hands to remove the scruff and the black pieces left are your seeds.
Storage
It is best to keep your seeds stored in an envelope so there is no chance of condensation getting inside, but a paper bag can work just as well. Keeping your seeds dry is important so they do not germinate or mold before you are ready to plant them. Let your seeds dry for a week before storing them in a cool, dry place. If you are worried about your seeds expiring, storing your seeds in the refrigerator well help them last for years.
We hope you are loving our blog! Don’t forget to add harvesting seeds to your Fall to-do list so you can plant more flowers in the seasons to come.
How far in advance should I book my wedding florist?
Book your florist AT LEAST 3-6 months ahead of your wedding date.
Consider the popularity of your florist and if you are getting married during peak wedding season, October, November, April, and May. Wedding florists typically have a cap on how many weddings they will take a day. So, if you have chosen a popular date to get married on, it is best to book your wedding florist a year or more in advance. Also, booking this far in advance allows room for changes to be made.
Can I expect delivery to be an additional cost?
You can expect delivery to be anywhere from 10-15% of your floral item total (pretax).
The last thing you want to add on top of wedding stress is a charge or fee you didn’t know about. Your florist may offer packages that include the transition and tear down of flowers after the delivery and set up. Discuss with your florist these options and be prepared to pay a little more than 10-15% of your floral item for the time the florist is having to keep the team at the venue.
Delivery and setup- Florist delivers and arranges the flowers but leaves after setup.
Transition- Florist delivers and arranges the flowers and stays to transfer floral pieces from the ceremony space to the reception space.
Teardown and clean up- Florist stays the whole wedding day to accomplish delivering and setting up, transitioning, and tearing down and cleaning up after the wedding is over.
Where should I focus my floral budget?
The ceremony space, table centerpieces, and bridal bouquet.
This all depends on what you prioritize. Focusing your floral budget on the ceremony space is best if you are wanting to get more out of your photos. If you prioritize your reception space, it may be best to spend more on the table centerpieces because that is what guests will be looking at the most and possibly be taking home. Your bridal bouquet is the most personal floral piece of the entire wedding and should be focused on if you prioritize up close photos like your bridal portraits.
Can I repurpose my ceremony flowers into my reception space?
Absolutely! There are a variety of ways to repurpose your flowers!
Considering how much you are paying for flowers, you want to make sure you are getting as much out of them as possible. Instead of asking your florist to make an arrangement for the sweetheart table, see if you can use your bridal bouquet as the centerpiece. We have had some couples ask us to move their floral nest from their ceremony space to somewhere in their reception space such as the head table or mantle. It is even possible to take apart the floral nest and repurpose it throughout different parts of the reception space, as seen below.
How do silk flowers compare to fresh ones?
Silk flowers are great because they don’t need water to last. However, these flowers often lack a realistic look. The best place to use silk flowers is an area where they won’t be viewed up close, such as a hanging floral arrangement. Fresh flowers are preferable for up-close, personal arrangements, such as bouquets and centerpieces. However, consider that out of water they may not look as well as when they were arranged. It should be noted that silk and fresh flowers are difficult to color match, so we try to avoid using them together.
Can I add décor items to my arrangements?
Yes, either they will be priced in, rented, or you will have to bring them to the florist.
Communicate with your florist if you can rent pieces, such as vases, or if they will have to be purchased. Wedding guests sometimes assume they can take home table arrangements, so communicating with your florist before hand can help avoid this confusion and any unwanted charges. Providing a list of decorative elements early on will help the florist plan if they need to order the pieces or if you need to provide them.
Will I be able to preserve my flowers after the wedding?
Yes, but have a plan.
If you want to preserve your flowers it is important that you keep them as fresh as possible. Keep them in a cool space in water. You will likely have to overnight mail your flowers, so make arrangements for you or a trusted person to do this between the wedding and honeymoon. Often times florists do not preserve flowers, so finding a company that can is as important as choosing a florist before your wedding.
Can I change my mind after our consultation?
The further out from the wedding the more flexible your florist can be.
A good rule of thumb is if you want to make changes to design, try to make those changes 2 months before the wedding date. If you have to change the number of florals needed, make sure this is communicated with your florist no less than 1 month out.
Can I have flowers that aren’t in season?
If the flowers you want are not in season, talk to your florist about similar flowers that can be used as an alternative. Typically, florists can still find flowers that aren’t in season, but keep in mind the flowers may be more expensive or harder to source.
Creating any floral arrangement for an event starts with processing your flowers so they can look as if they were picked day of.
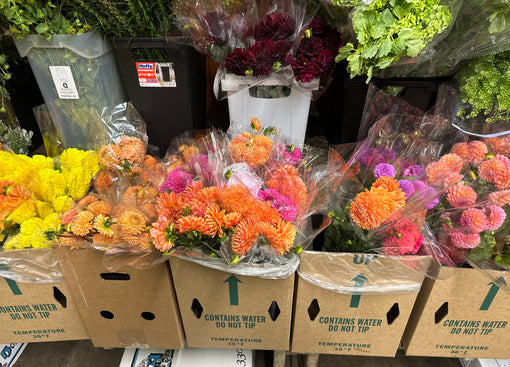
Sourcing your flowers
The first step is figuring out where you want to get your flowers from. You can get your flowers from a local farm (like ours), floral shop, grocery store, or online. You can even grow your own! You want to make sure you source your flowers 3-4 days before the event. This way you have time to make your floral arrangements and they will still be fresh by the time of the event.
Typical floral arrangements consist of four different types of flowers: focal, secondary, filler flowers, and greens. Focal flowers are generally going to be face flowers, such as peonies and dahlias. You want to make sure whatever flowers you pick to be your focal flowers stand out and make a statement.
Your secondary flowers are going to be a little smaller than your focal flowers and you want to make sure that these flowers compliment your focal flowers. Some examples are zinnias, tulips, and snapdragons.
Filler flowers are generally small clusters of flowers that can be added into the empty space of any bouquet or arrangement to make it appear fuller. Green mist/dara caucus are some great options. Some of my other favorites are wax flower and statice.
Lastly, you want to pick some greenery. The purpose of adding greenery to your arrangement is to add volume and make it look natural. FUN TIP: Incorporate herbs! This will make the arrangement smell great. In the picture below we have lemon basil.
Storage
The first thing you’ll want to do is make a fresh cut at the bottom of all of your stems. Remove any unwanted foliage and thorns (if applicable) from the bottom 2/3 of the stem. If going for a garden style look leave more foliage on the stem as long as the foliage is in good shape. QUICK TIP: An easy way to remove thorns is by pressing on the side of them until they pop off or using scissors or a knife to shave the thorns off.
You want to store your flowers in cool water. Two gallon Home Depot buckets work great because of their height. Fill your bucket with about 2 inches of water. If the flowers in your bucket have a stockier stem, fill the bucket about 3 inches. Make sure no foliage is in the water, you want to keep your water as clean as possible. Repeat this process every two days to ensure your flowers always have fresh, clean water. If you don’t have a cooler, store your flowers in a cool dark place away from fresh fruit. As fruit goes bad, the gases released can cause the flowers to brown prematurely. Also, keep your flowers away from air vents so they do not have direct air blowing on them. Doing this ensures that your flowers will last until they are ready to be used.
Here’s what your flowers should look like before and after they are processed.
Here’s some bonus tips for creating your arrangement!
Your flowers are fresh, but you want them to also look in full bloom for your arrangement. If you are working with roses, hold the stem with the flower facing down, as if you were clapping, and roll it back and forth between your hands. Doing this will open the face of the flower and give it more volume.
You can make your carnation flower look like a poppy by using these steps:
1. Pull down on the outer green petals
2. Spread the carnation head
3. Pinch out the center petals until the green center is exposed
After we processed our flowers, here’s how our bride’s bouquet looked the day of the wedding!
Good news! We’re going to be putting out blog posts weekly! Be sure to follow our social media and sign up for our newsletter to stay up to date with our blog.
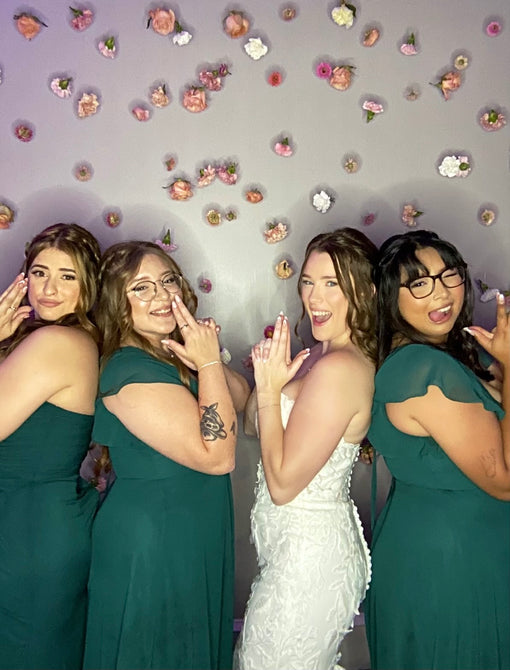
We love it when our brides come to us with new ideas. Last week we created the most beautiful piece of floral work for one of our brides, a floating flower photo backdrop.
This is easy to make at home and is the perfect photo opportunity at weddings, showers, and birthday or graduation parties. You and your guests are going to love the magic this backdrop brings to photos!
Time: 2-4 hrs
Supplies: Needle, Fishing Line, Metal Frame/PVC
How We Did It
The first step to creating any floral piece is to select your flowers. One of the best things about this backdrop is that there is so much room for creativity. You can select almost any flowers you want, big or small. Go with a color scheme or something abstract, it’s all up to you!
When selecting your flowers make sure you pick ones that can stand being out of water for a while and still look nice. A good rule of thumb is that if the flower’s petals are thin and delicate they probably will not do well out of water. Some good options are roses, carnations, mums, zinnias, spray roses and poms. Try to stay away from anemones, hydrangeas, ranunculus and scabiosa.
Start by cutting all the stems off your flowers. Cut a piece of fishing line about 4 inches more than the height of your backdrop.
Thread your fishing line through the needle and secure it with a double knot. It’s important to use a fishing line not only because it is super strong, but it’s nearly invisible. This is what is going to give the flowers that floating illusion.
After you have threaded your needle, stick it through the base of your flower. Pull the needle and fishing line all the way through until your flower is at the end of the line. Make sure to leave a little extra line for when you tie it to your frame.
Secure your flower in place on the line with a double knot. Repeat the process with another flower about a foot from the last one. Keep in mind when stringing your flowers that you want to work from the end with no needle to the end with the needle.
When your string of flowers is finished it should look like this:
Use the extra line left on the end to tie the string to your frame. Metal frames can be purchased on Amazon. Here’s a link to one on Amazon: https://www.amazon.com/dp/B0D6GBY3RC?ref=ppx_pop_mob_ap_share
However, if you are looking for a cheaper alternative PVC pipe can work just as well. Get a PVC pipe the desired length of your backdrop and string some of that fishing line through leaving a generous amount left on each side. Using that extra line coming out of each side of the pipe, tie your PVC pipe where you want to hang your backdrop. If there is nowhere to hang it from, you can use command hooks.
There are so many ways you can add your own personal touch to this floating floral backdrop. Having an event in the evening? Add string lights to brighten up the space! Another idea is to tie some ribbon into bows in between the flowers. This can add so much personality and texture to your backdrop, and the bows will look like they are floating too!
Tips!
You don’t have to be consistent with the placement of your flowers and the length of your line. When the flowers are staggered it looks a lot more natural, as if they were falling from the sky.
Try to avoid putting the same flowers next to one another. Having a cluster of flowers in the backdrop can be distracting and look unnatural.
Stick your needle through the thickest part of the flower. This is going to help your flowers face forward rather than face down once they are hung.
Work together! This project can be time consuming. We were able to get ours done in about 2 and a half hours between 3 people.
If you decide to make a floating flower backdrop, we would love to see your work! Send your pictures to our Instagram @b.blumenflowerfarm, or tag us in your photos. Make sure to check out our social media to see more of our floating floral backdrop from last week’s wedding and other ideas for your future event.
We get asked all of the time what kind of flowers we can grow here in Texas and as you can see from the list below, your options are quite extensive!
I hope this can be used as a tool for you in your garden where you can see what grows here in North Texas. Some varieties are started in the greenhouse in late winter and early spring to give them a chance to mature before the heat sets in (Snapdragons, Stock, Clarkia). While others are succession planted throughout the year for continual harvests (Celosia, Zinnias, Sunflowers, Amaranthus, Statice).
It should be noted: this list includes most of the things we'll be growing from seed this year but does not include all of bulbs and tubers (gladiolus, tulips, daffodils, dahlias, etc.).
Amaranthus - Velvet Curtains
Asclepias - Branch - Orange
Asclepias - Branch - Swamp
Atriplex - Copper Plume
Basil - Cinnamon
Basil - Lemon
Basil - Original
Butterfly Pea
Campanula (4 packets)
Celosia - Branch - Celway Terracotta
Celosia - Branch - Flamingo Feather
Celosia - Branch - Flamingo Purple
Celosia - Single- Chief Mix
Celosia - Single- Cristata Mix
Celosia Cramers - Branch - Burgundy
Celosia Cramers - Branch - Rose
Celosia Sunday - Branch - Bright Pink
Celosia Sunday - Branch - Cherry
Celosia Sunday - Branch - Wine Red
Centaurea
Clarkia - Elegant Salmon
Clarkia- Godetia - Grace Mix
Cosmos - Double Click Mix
Cosmos - Snow Puff
Dahlia - Giant Mix
Daisy Seeds - Crazy Daisy
Dianthus - Sweet Pink
Dianthus - Volcana Mix
Didiscus - Lacy Lavender
Didiscus - Lacy Pink
Feverfew - Sunny Ball
Feverfew- Tetra White
Feverfew- Virgo
Firmament - Mystery Rose
Firmament- Original
Goldenrod - Golden Baby
Gomphrena - Mix
Gomphrena - Raspberry Cream
Mahogany Hibiscus
Marigold - CoCo Gold
Marigold - Orange
Marigold - Yellow
Nigella - Delft Blue
Nigella - Love-in-a-mist
Orlaya - White Finch
Pampas Plume - Branch - Mix
Persian Cress
Ruby Moon Hyacinth
Rudbeckia - Double Gold
Salvia - Oxford Blue
Saponaria- Pink Beauty
Scabiosa - Triple Berry Mix
Sea Holly - Blue Cap
Shiso
Snapdragon - Costa - Apricot II F1
Snapdragon - Potomac - Berry Blend F1
Snapdragon- Chantilly- Light Pink F1
Snapdragon- Chantilly- Light Salmon F1
Snapdragon- Costa - Mix F1
Snapdragon- Madame Butterfly- F1
Snapdragon- Potomac - Early Sunrise
Snowflakes Baby's Breath
Statice - Apricot
Statice - Formula Mix
Statice- Pastel Mix
Stock - Iron Pastel
Stock - Katz Mix
Sunflower - Autumn Beauty
Sunflower - Branching - Florenza
Sunflower - Branching - Red Hedge
Sunflower - Branching - Sonja
Sunflower - Branching- Buttercream
Sunflower - Mixed
Sunflower - Single - Procut Peach
Sunflower - Single - Procut Red
Sunflower - Single - Procut Red
Sunflower - Single - Whie Lite
Sunflower - Single stem- Teddy Bear
Sunflower - Single- ProCut Bicolor
Sunflower- Branching - Strawberry Blonde
Sunflower- Single - Gold Lite
Sunflower- Single - Plum
Zinnia - Benary - Bright Pink
Zinnia - Benary - Carmine Rose
Zinnia - Benary - Coral
Zinnia - Benary - Purple
Zinnia - Benary - Salmon Rose
Zinnia - Benary - White
Zinnia - Benary - White
Zinnia - Oklah - Carmine
Zinnia - Oklah - Golden
Zinnia - Oklah - Ivory
Zinnia - Oklah - Pink
Zinnia - Oklah - Salmon
Zinnia - Oklah - White
Zinnia - Queen - Lemon Peach
Zinnia - Queen - Lime Orange
Zinnia - Queen - Lime with Blush
Zinnia - Queen - Red Lime
Zinnia- Landscape - Zahara
Zinnia- Mix- Jim Baggett
Zinnia- Persian Carpet
I hope this helps, Happy Gardening!! <3
Creating a flourishing flower farm isn't just about nurturing beautiful blooms; it's also about cultivating healthy soil that serves as the foundation for vibrant plant life. At our organic flower farm, nestled in the heart of Godley Texas, we embarked on a transformative journey to improve our soil composition over three years using a No-Till approach. In this blog post, we'll share our experience, insights, and the remarkable outcomes of our commitment to sustainable and regenerative farming practices.
Year 1: Laying the Groundwork for Change
Three years ago, we recognized the need to address soil health on our flower farm. Our journey began with a comprehensive soil test that revealed imbalances in nutrient levels and soil structure. In our area this meant high alkalinity, low organic matter, non-existent phosphorus levels and so much more. Instead of resorting to conventional tilling, which can disrupt the soil ecosystem, we opted for the No-Till approach. By refraining from mechanical tilling, we preserved the intricate web of microorganisms, fungi, and earthworms that play a crucial role in soil fertility. They really are the backbone to our entire farming operation.
In our first year, we implemented cover cropping along with planting flower crops to protect the soil from erosion, fix nitrogen, and improve overall soil structure. By planting a mix of legumes, grasses, and other cover crops, we added organic matter to the soil, which set the stage for the changes to come.
Year 2: Nurturing Biodiversity and Soil Life
The second year saw a more diverse planting strategy as we introduced a wider range of flowering plants. This not only enriched the aesthetic appeal of our farm but also promoted biodiversity above and below the ground. The presence of various plant species encouraged a diverse microbial community, enhancing nutrient cycling and disease resistance.
To further enhance soil composition, we adopted a practice known as "chop and drop." Instead of removing spent plants, we allowed them to decompose directly in the soil, contributing to organic matter and enriching the soil's microbial life. This practice also helps in retaining moisture, which is essential for our arid climate.
Some other soil problems and solutions we came up with are as follows:
High alkalinity: we add 2 pounds of elemental sulfur to every 100 sq. ft of bed every year to help bring down the ph.
Low Phosphorus levels: every seedling is planted with a pinch of bone meal to make up for the deficiencies in soil. We also use buckwheat as a cover crop whenever possible. Buckwheat has a long tap root that fixes nitrogen within the plant so when we use the "chop and drop" method explained above it adds phosphorus back to the top 4" of soil.
Low Organic Matter: We purchase the best quality compost that we can get our hands on in our area roughly 6 months before we plan on needing to use it. This allows the compost to continue to cook and build biodiversity making it more easily assimilated into the soil.
Year 3: Reaping the Rewards
As we entered the third year of our No-Till journey, the transformation in our soil was evident. The texture had improved, becoming looser and more crumbly, allowing for better root penetration and water infiltration. Our soil's nutrient levels had also become more balanced, leading to healthier and more vibrant blooms.
In this phase, we introduced minimal disturbance planting techniques, carefully placing seeds and transplants directly into the ground without disturbing the soil structure. The result was a healthier root system and reduced weed pressure, as disturbed soil often triggers weed germination.
Conclusion: A Sustainable Path to Success
Our three-year journey into No-Till organic flower farming taught us invaluable lessons about patience, observation, and the incredible resilience of nature. By embracing regenerative practices, we not only transformed our soil composition but also ensured the long-term sustainability of our flower farm. No-Till farming empowered us to work hand in hand with nature, creating a haven where both blooms and soil thrive harmoniously. As stewards of the land, we are inspired to continue this journey, advocating for a healthier ecosystem while reaping the beauty of our labor in each exquisite petal that graces our farm.